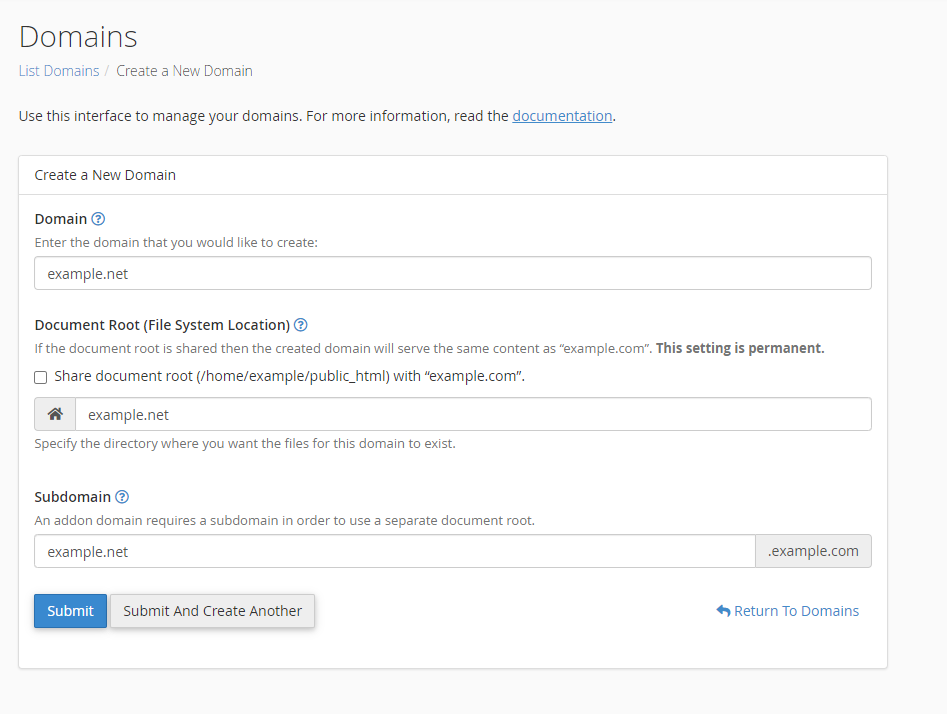
Adding an Addon Domain in the latest version of cPanel is straightforward. Follow these steps to set up a new domain under your existing hosting account.
Step 1: Log in to cPanel
- Open your web browser and go to your cPanel login page.
- Enter your username and password, then click Log in.

Step 2: Access Domains Management
- In the cPanel dashboard, locate the Domains section.
- Click on Domains (or a similar option depending on your cPanel theme).

Step 3: Add Your Addon Domain
- In the Domains section, click on Create A New Domain.
- In the Domain field, enter the domain name you wish to add (e.g., example.com).
- By default, the Share document root option is marked. This means the addon domain will share the same public_html.
directory as your primary domain, which can cause conflicts and errors. - Unmark the “Share document root” option to create a separate directory for your addon domain. This step is essential to avoid issues and keep your domain’s files isolated.
- After unmarking the option, a new field will appear where you can specify the directory for the addon domain’s files. By default, cPanel will create this directory automatically, but you can customize it if needed.
- If desired, you can set up a custom subdomain. However, cPanel will create one automatically based on the domain name you entered.
- Click Add Domain to complete the process.


Congratulations! You have successfully added a new addon domain to your cPanel account. The new domain now has its own directory, making it easy to manage files separately from your primary domain.
Step 4: Verify the New Domain
- Ensure the new domain appears in your list of domains within cPanel.
- Visit the domain in your browser to check that it points to the correct directory.
Conclusion
You’ve successfully added a new Addon Domain to your cPanel account. You can now manage its files, emails, and other settings as needed.

