If you’re looking to expand your website with additional sections like a blog, shop, or forum, creating a subdomain is a great way to organize your content. In this guide, I’ll walk you through the steps to create a subdomain using the latest version of cPanel. Follow these simple instructions, and you’ll have your new subdomain up and running in no time!
- Log into cPanel:
- Go to your cPanel login page by typing yourdomain.com/cpanel
. - Enter your username and password to access your cPanel dashboard.

- Go to your cPanel login page by typing yourdomain.com/cpanel
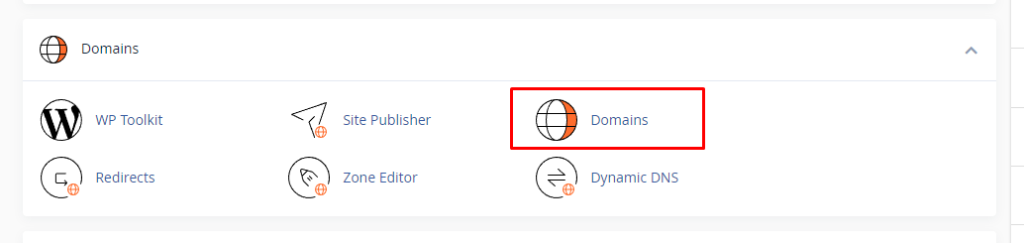
- Access the Domains Section:
- Once logged in, locate the Domains section on the cPanel home page.
- Click on Domains (Note: In the latest cPanel versions, subdomains are managed under the “Domains” interface rather than having a separate “Subdomains” icon).
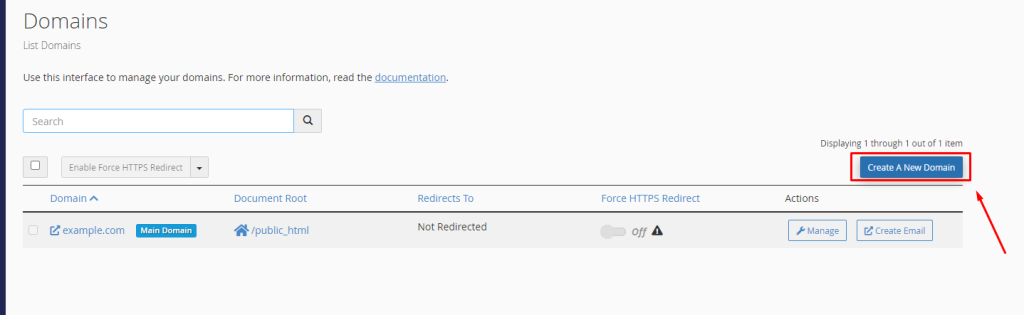
- Create the Subdomain:
- In the Domains interface, click on the Create A New Domain button.
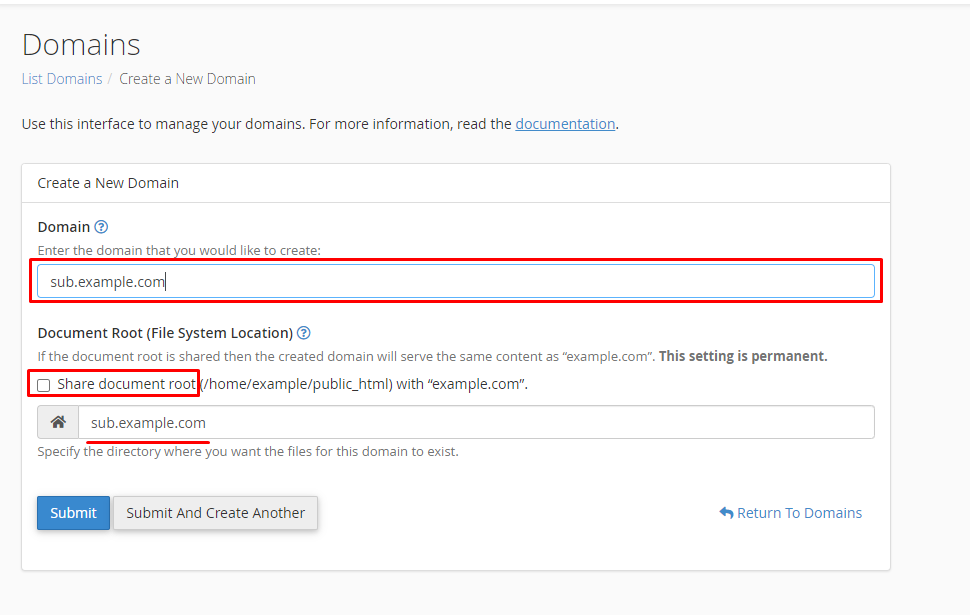
- In the Domain field, enter the subdomain you wish to create (e.g., blog.yourdomain.com).
- Under the Share document root with “yourdomain.com” option, uncheck the box if you want the subdomain to have a different document root (a separate directory).
- If the box is unchecked, a new field will appear allowing you to specify or confirm the document root for the subdomain.
- Click the Submit button.
- Confirmation and Management:
- Once created, you’ll see the subdomain listed under the “Domains” section.
- You can manage the document root and other settings from here or upload content directly to the subdomain’s directory via the File Manager.

- DNS Settings (if required):
- If your domain’s DNS is managed outside cPanel (Ex: Cloudflare), add a DNS record for the subdomain. Typically, this will be an A record pointing to your server’s IP address.
- Testing the Subdomain:
- Allow time for DNS propagation if changes were made, then visit the subdomain in a web browser to ensure it’s working.
Your subdomain is now set up and ready to use!
