Give your Blogger blog a personalized touch by adding a custom domain. Follow these steps to replace the default blogspot.com address with your custom domain.
Step 1: Get a Custom Domain
- Purchase a custom domain from a domain registrar of your choice. For the best price and full control, consider getting your domain from Cyberison.
Step 2: Connect to Blogger
- Go to the Blogger website and log in to your Blogger account.
- Select the blog you want to connect to your custom domain from the Blogger dashboard.
- In the left sidebar, click Settings, then select Custom Domain under the Publishing section.

Step 3: Add Your Custom Domain
- In the Custom Domain field, enter your purchased domain (e.g., www.yourdomain.com), including www.
- Click Save. An error may appear, indicating that you need to set up CNAME records.

Step 4: Change Nameservers
- Log in to your domain registrar’s control panel.
- Navigate to the nameserver settings.
- Set the domain’s nameservers to the default nameservers provided by your domain registrar. For example:
- ResellerCamp: ns1.liqu.id and ns2.liqu.id
- PDR: pdrdns.mercury.orderbox-dns.com, pdrdns.venus.orderbox-dns.com, pdrdns.earth.orderbox-dns.com, and pdrdns.mars.orderbox-dns.com
- Contact support to verify the main registry of your domain if needed.

- Save the changes to update the nameservers.
Step 5: Update DNS Records
Add A Records

- In the DNS Management section, add the following A records:
- Hostname: @, Address: 216.239.32.21
- Hostname: @, Address: 216.239.34.21
- Hostname: @, Address: 216.239.36.21
- Hostname: @, Address: 216.239.38.21

Add CNAME Records

- Add the CNAME records noted from Blogger:
- First CNAME: Hostname: www, Value: ghs.google.com
- Second CNAME: Use the unique record provided by Blogger.

Step 6: Verify and Save
- Wait for DNS changes to propagate. This process can take up to 48 hours.
Once propagation is complete:
- Return to your Blogger dashboard.
- Click Save for your custom domain.

If the changes are successful:
- Your domain will be saved without any errors.

Step 7: Enable HTTPS
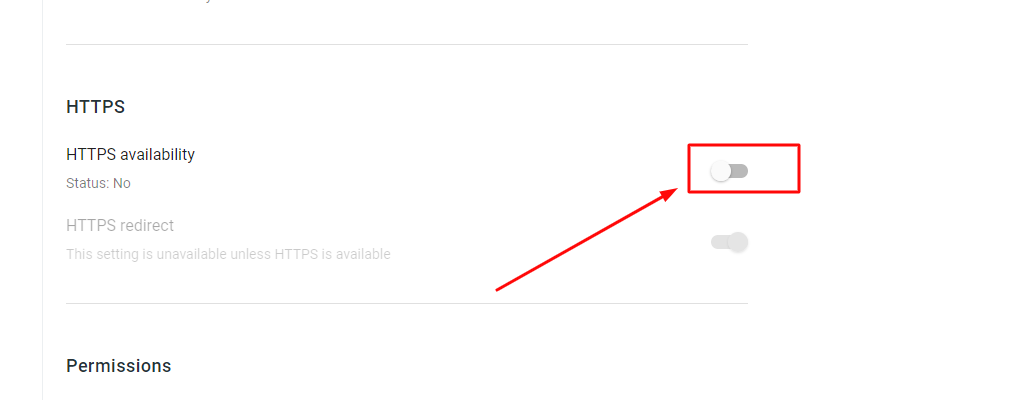
- In your Blogger dashboard, go to Settings.
- Under HTTPS availability, select Yes to enable HTTPS for your custom domain.

Note:
- It may take a few hours or up to 48 hours for HTTPS to become available. Check back later to confirm when the status changes to Status: Available.

Your custom domain should now be successfully connected to your Blogger blog. Enjoy your new, personalized web address!
